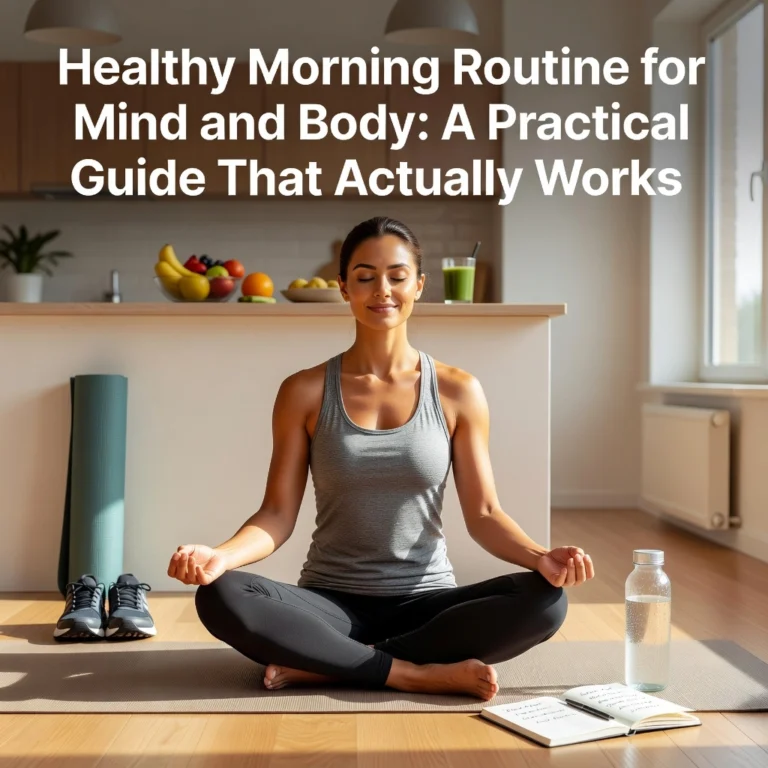
Full Body Calisthenics Workout: Complete Routine With No Equipment
I started my fitness journey convinced I needed a gym membership. Six months in, I had a membership I barely used, a credit card charge I regretted, and the same body I started with. The real shift came when I ditched the gym guilt and committed to a full body calisthenics workout in my living room three times a week. No equipment. Twenty minutes. That’s when things actually changed.
This post contains affiliate links. If you buy through them, I earn a small commission at no extra cost to you.
The problem with most calisthenics advice is that it assumes you can already do a pull-up or hold a handstand. If you’re a beginner, those posts don’t help. This one is different. I’m walking you through a full body calisthenics routine no equipment that works right now, even if you can’t do a standard push-up yet. We’ll cover every major movement pattern: pushing, pulling, squatting, hinging, and core work, all in a single 20-minute session you can do three times a week.
TL;DR
- A full body calisthenics workout takes 20 minutes, three times a week, and builds real strength with zero equipment.
- Start with modifications: wall push-ups instead of floor push-ups, step-back lunges instead of full-depth squats, beginner pull work instead of pull-ups.
- The five movement patterns you need are: push, pull, squat, hinge, and core work.
- Progress happens when you add reps, not when you jump to harder variations. Stay with the easier version until it feels easy.
- Pair this with our complete 8-week calisthenics plan for a full training structure.
What is a full body calisthenics workout?
A full body calisthenics workout uses only your bodyweight to train all major muscle groups in a single session. You’re not isolating muscles. Instead, you’re hitting your chest, back, shoulders, legs, and core in movement patterns that mimic how your body actually works.
The advantage is simplicity. No equipment means no setup time, no thinking about which machine to use, no excuses about the gym being busy. Your living room, your backyard, or a park is enough.
The disadvantage is that beginner-friendly means you’ll start with easier versions of standard exercises. Wall push-ups instead of floor push-ups. Assisted lunges instead of jump lunges. That’s not weakness; that’s smart programming.
The five movement patterns you need
Every effective full body calisthenics routine hits these five patterns:
Push: chest, shoulders, and triceps work against resistance. Think push-ups, pike push-ups, or dips.
Pull: back and bicep work. Rows, dead hangs, or resistance band pull-ups count here.
Squat: lower body push. Bodyweight squats, lunges, or step-ups.
Hinge: lower back and hamstring work. Glute bridges, good mornings, or single-leg deadlifts.
Core: anti-rotation, anti-extension, and stability. Planks, dead bugs, or hollow body holds.
In a single session, you don’t need to do three exercises per pattern. One solid exercise per pattern, done with good form and proper volume, is enough.
Who this works for: anyone who has a spare 20 minutes and a floor.
Common mistake: trying to do too many exercises in one session. Twelve exercises in 20 minutes means rushing and poor form. Stick to five to six exercises total.
Full body calisthenics workout: the complete routine
Here’s the workout I recommend for beginners. Do this three times per week, on non-consecutive days (e.g., Monday, Wednesday, Friday). Rest two full minutes between sets for compound movements (push, pull, squat, hinge) and 30 to 60 seconds for core.
| Exercise | Sets | Reps | Rest | Beginner Mod | |—|—|—|—|—| | Wall push-ups | 3 | 10-12 | 90 seconds | Incline push-ups (hands on a bench) | | Assisted rows | 3 | 8-10 | 90 seconds | Inverted rows under a table | | Bodyweight squats | 3 | 12-15 | 90 seconds | Hold a chair for balance | | Glute bridges | 3 | 12-15 | 60 seconds | Single-leg variations once stronger | | Plank hold | 3 | 20-30 seconds | 60 seconds | Plank on knees |
Total time: about 22 minutes including rest.
Push: wall push-ups
Stand arm’s length away from a wall, feet shoulder-width apart. Place your hands on the wall at shoulder height. Lean forward, bend your elbows, and bring your chest toward the wall. Push back to the starting position.
The benefit of wall push-ups is that they teach the movement pattern without the intensity. You can’t do 50 and expect strength gains, but you can do 10 to 12 with perfect form and feel your chest and shoulders working.
Progress by moving your feet further from the wall. After two weeks, try incline push-ups with your hands on a bench or sturdy chair instead. After four weeks, try knee push-ups (same as floor push-ups but on your knees). This progression works.
Who this works for: anyone starting from zero upper body pushing strength, which includes most beginners.
Common mistake: doing push-ups with your elbows flared wide. Keep your elbows at a 45-degree angle to your torso, not perpendicular. This protects your shoulder joints.
Pull: assisted rows
Find a sturdy table or low bar (a pull-up bar at chest height works, or even a sturdy crib rail if you have one at home). Lie underneath it with your body straight, heels on the ground, hands gripping the edge. Pull your chest toward the bar, then lower with control.
If a table is too high, the exercise is too easy. If it’s too low, you’re nearly horizontal and the movement is too hard. You want a height where your body is at roughly a 45-degree angle.
This is the most underrated pulling exercise for beginners. It builds back strength and teaches the row pattern without needing a pull-up bar or weights.
Who this works for: anyone who can’t do a pull-up but wants to build toward one.
Common mistake: pulling with your arms instead of your back. Think elbows-to-hips, not hands-to-chest. Squeeze your shoulder blades together at the top.
Squat: bodyweight squats
Stand with feet shoulder-width apart, weight in your heels. Lower your hips back and down, as if sitting into a chair. Keep your chest upright and your knees tracking over your toes. Stop when your thighs are parallel to the ground (or as deep as your mobility allows), then push through your heels to stand.
Bodyweight squats feel light if you’re used to weighted exercises, but for beginners, they’re perfect for learning the movement and building leg endurance.
If you lose balance or feel unstable, hold a chair or a door frame with one hand. This is not cheating; it’s smart programming that lets you focus on form.
Who this works for: anyone with functioning knees and hips who wants to build lower body strength.
Common mistake: letting your knees cave inward as you squat. Press your knees outward slightly throughout the movement. Your knees should track over your toes, not drift toward the midline.
Hinge: glute bridges
Lie on your back with your knees bent and feet flat on the floor, hip-width apart, about 12 inches from your glutes. Push through your heels, drive your hips upward, and squeeze your glutes hard at the top. Lower back down with control.
The glute bridge is misunderstood. It’s not a leg exercise; it’s a hip extension exercise that teaches your glutes to work. If you feel this in your lower back instead of your glutes, you’re not squeezing at the top.
Once this feels easy (around week three), progress to single-leg glute bridges: do the same movement with one foot planted and the other leg straight, working one side at a time.
Who this works for: anyone with lower back tightness, sedentary work habits, or weak glutes.
Common mistake: not squeezing your glutes at the top. The squeeze is not optional; it’s the entire point. Pause for one second at the top and truly clench.
Core: plank hold
Forearm plank: get into a plank position with your forearms on the ground, elbows under your shoulders, and your body in a straight line from head to heels. Engage your core, squeeze your glutes, and hold without sagging.
A good plank is not about how long you can hold it. It’s about maintaining neutral spine and bracing your core. A 20-second plank with perfect form beats a 60-second plank where your hips sag.
Progress by adding reps (three sets of 20 seconds becomes three sets of 30 seconds) or by adding a side plank variation once the forearm plank feels stable.
Who this works for: anyone who wants to build a strong, stable core without spinal extension.
Common mistake: letting your hips sag toward the floor. Imagine a string pulling your hips up and your shoulders back. Your body should be completely straight.
How to progress your full body calisthenics workout
Progression doesn’t mean jumping to a harder exercise. It means making the current exercise harder while staying safe.
Week 1-2: focus on form over reps. Do three sets of the prescribed reps and get comfortable with the movement.
Week 3-4: add one or two reps per set if the movement feels stable. Wall push-ups from 10 reps to 12 reps. Bodyweight squats from 12 reps to 14 reps.
Week 5-6: once you hit the top end of your rep range comfortably, move to a harder variation. Wall push-ups to incline push-ups. Assisted rows to a higher bar (more horizontal). Bodyweight squats with a pause at the bottom.
Week 7-8: reassess and decide if you want to keep pushing the same exercises or move to harder versions. If you’ve been consistent, you’re ready for a new progression phase or a new routine altogether.
This is slow. It’s also how you build sustainable strength without injury. Beginners who try to progress faster end up hurt or burnt out.
Bodyweight vs weights: which should beginners start with?
This is the honest comparison: weights let you add load faster, but bodyweight teaches you movement patterns without external load obscuring your form.
If your goal is to look stronger, weights will get you there faster. If your goal is to be stronger, bodyweight builds a better foundation. You also learn to control your own body, which is the definition of functional strength.
My recommendation: start with bodyweight for four to eight weeks. Get comfortable moving through space. Build work capacity and movement quality. Then, if you want to progress faster, add dumbbells or resistance bands to your routine.
The full body calisthenics workout is the right starting point because it doesn’t require any financial investment and it works. You’ll see measurable progress in strength, endurance, and body composition if you’re consistent and manage your nutrition (which matters more than the workout itself).
How often should you do this routine?
Three times per week is ideal. This gives you enough volume to see progress and enough recovery time to adapt.
Two times per week works if you genuinely can’t fit in three sessions. It will take longer to see results, but consistency beats perfection.
Four or five times per week is overkill for a beginner. You’re more likely to overtrain, get sore, and skip workouts. Rest days are part of the programme.
Can you build muscle with calisthenics alone?
Yes. You don’t need heavy weights to build muscle. You need progressive overload, adequate protein, and recovery. All three are possible with calisthenics.
Progressive overload with bodyweight looks like adding reps, reducing rest time, or moving to a harder variation (floor push-ups instead of wall push-ups). Do this consistently and your muscles will grow.
Adequate protein means aiming for 1.6 grams per kilogram of bodyweight (0.7 grams per pound). A 70 kg person needs about 110 grams of protein daily. This is harder to hit without protein powder, but it’s doable with chicken, eggs, and Greek yogurt.
Recovery means sleeping seven to nine hours per night and not doing this workout on consecutive days. Muscles grow when you rest, not when you exercise.
Equipment recommendations if you want to progress
You don’t need equipment to start. But after 4-8 weeks, adding resistance makes progression easier and faster.
Budget option (under $20): Resistance loop bands. They’re cheap, portable, and let you add load to squats (loop around your back) and pull-ups (loop around the bar and your feet). Amazon has a pack of five for about $12.
Mid-range ($20-60): A pair of adjustable dumbbells (5-10 kg / 12-22 lbs) plus a pull-up bar for a doorframe. Dumbbells let you add load to lunges, glute bridges, and single-leg work. A pull-up bar lets you progress from rows to actual pull-ups. Combined cost is about $50-60.
Best overall: Same as mid-range: dumbbells plus a doorframe pull-up bar. This combination gives you the most variety and the clearest path to strength progress. A basic doorframe bar costs $15-25 and requires no installation. Adjustable dumbbells run $40-50 for beginner weights.
What to do this week
Pick three non-consecutive days to train. Monday, Wednesday, Friday works well. Do the five exercises in the order listed, rest as prescribed, and focus on form over speed. Aim for two or three sets per exercise rather than three from the start if you’re completely new to training.
Track your reps in your phone or a notebook. The goal isn’t perfection; it’s consistency. Show up three times this week, and you’ve already ahead of where you were last week.
If you want a longer-term structure, we have a complete 8-week calisthenics plan that builds on this single-session workout. Read that post after you’ve done this routine twice so you understand what you’re building toward.
Frequently Asked Questions
Can I do this workout every day?
No. Doing this routine daily will overuse your muscles and joints without giving them time to adapt. Stick to three days per week with at least one rest day between sessions. If you want to move more, add a separate low-intensity session like a walk on your off days, but keep the resistance training to three times weekly.
How long before I see results?
Strength gains start after two weeks of consistent training. Visible changes in body composition take four to six weeks and depend heavily on your nutrition. If you’re also managing your calorie intake and eating enough protein, you’ll notice a difference by week four.
Do I need to warm up before this workout?
Yes. Spend five minutes walking around your house, arm circles, or light jumping jacks to get your heart rate up and your joints moving. This reduces injury risk and makes the workout feel easier. A proper warm-up doesn’t mean strenuous; it means raising your core temperature and preparing your nervous system.
What if I can’t do any of the beginner modifications?
Start even easier. Wall push-ups done standing further from the wall. Squats holding a chair with both hands instead of one. Rows from a higher surface. Planks on your knees instead of your forearms. The goal is movement, not intensity. Once you can do three sets of ten reps of the easiest version, you’re ready to progress.